Wmap
User Guide
Dive guide for the wrecks of Western Norway
The chart loads immediately — no login needed. Pan and zoom with mouse or touch. The nautical chart shows depths, hazards, and seamark buoys.
Tap the ☰ button top-left to open the catalogue. Search by name, filter by type or depth, or tap any coloured marker directly on the chart.
Enable GPS, select a wreck, then tap "Navigate here". The compass and distance readout update live as you move.
The Map
The chart, its layers, and how to navigate.
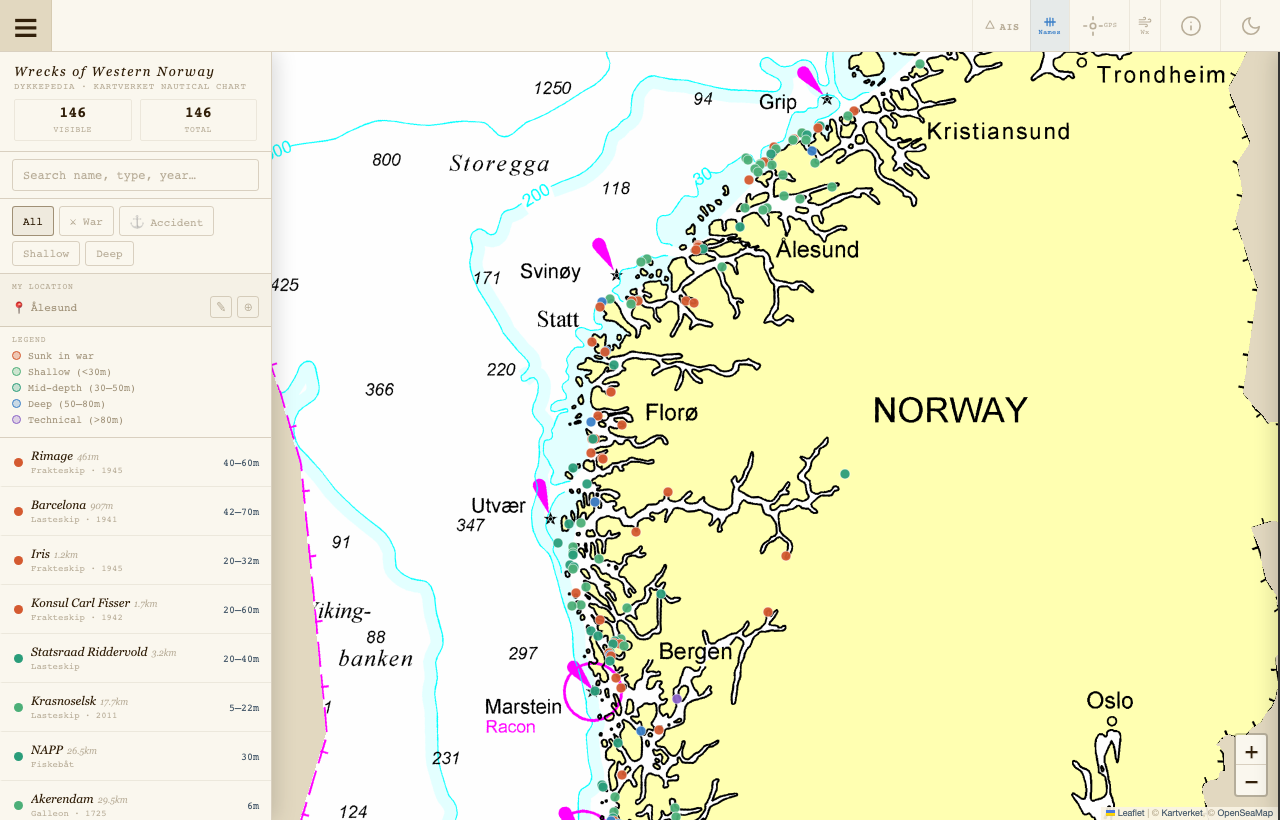
Wmap uses the Kartverket official nautical chart as its base layer — the same chart used for real coastal navigation in Norway. It shows accurate depths, rocks, shoals, fairways, port markings, and all standard navigation symbols.
Over the nautical chart, a semi-transparent OpenSeaMap overlay adds crowdsourced seamark data: buoys (with their light characters and periods), maritime hazard markers, and wrecks already charted by the boating community.
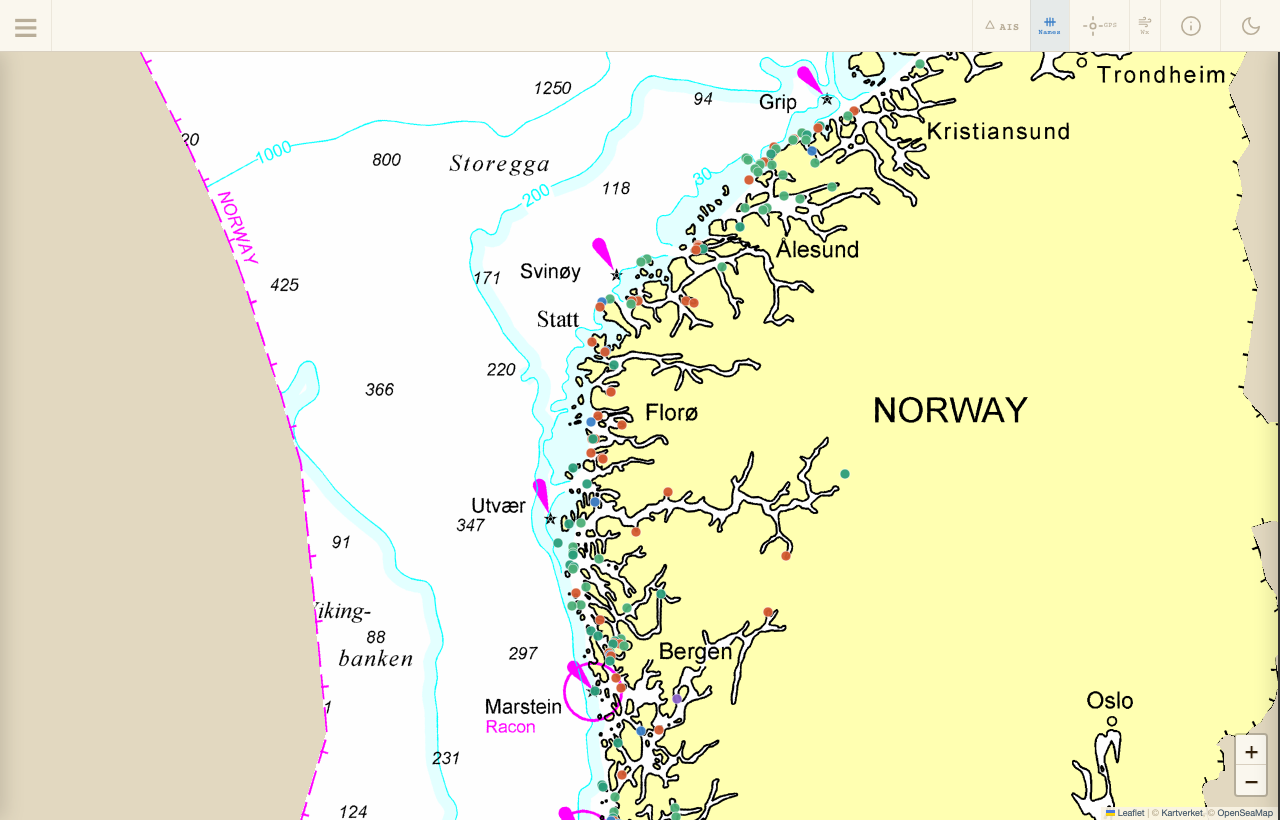
Navigating the chart: drag to pan, scroll-wheel or pinch to zoom, or use the + / − controls in the map's bottom-right corner. On touch screens, standard two-finger gestures work throughout.
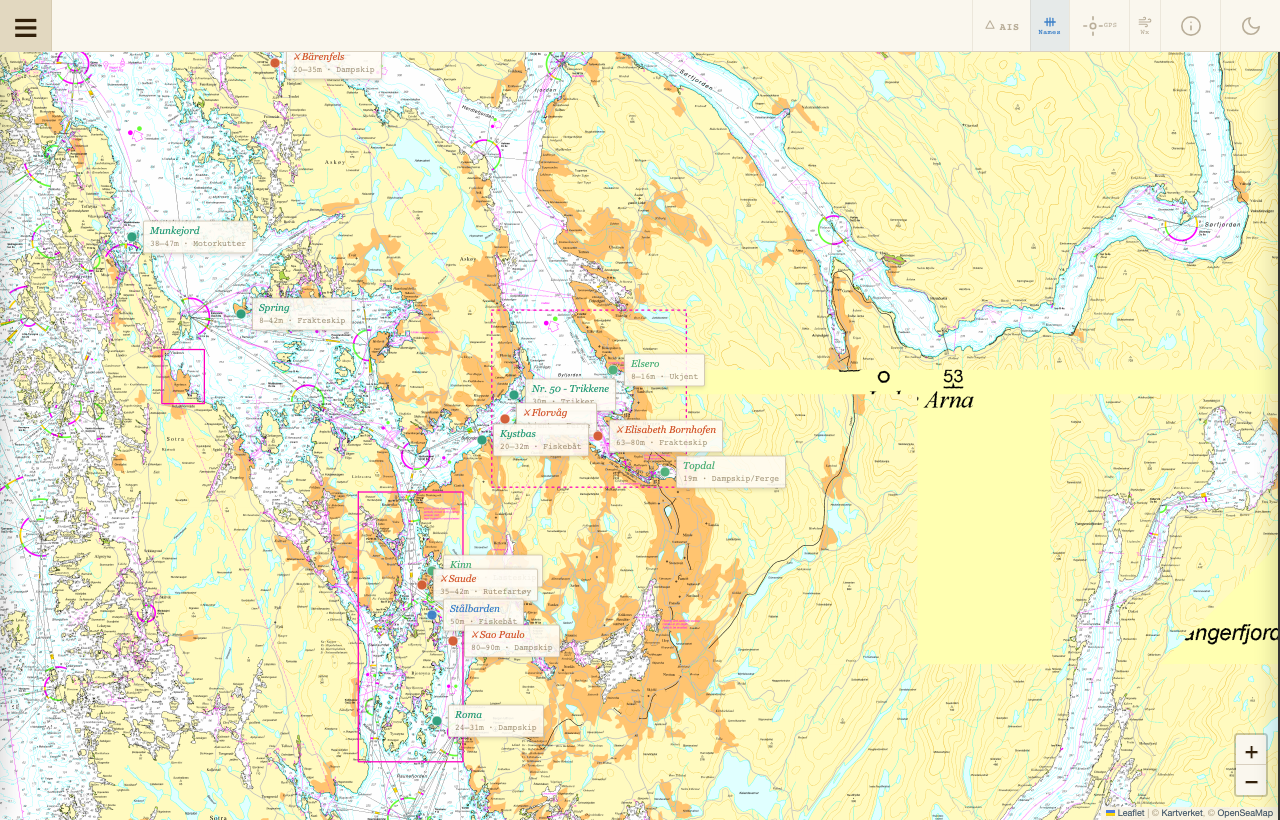
Zoom in past level 11 and wreck name labels appear on the chart automatically. Zoom back out and they disappear to keep the chart clean. The Names button in the toolbar toggles this behaviour.
Wreck Catalogue
Browsing, searching, and filtering 150+ dive sites.
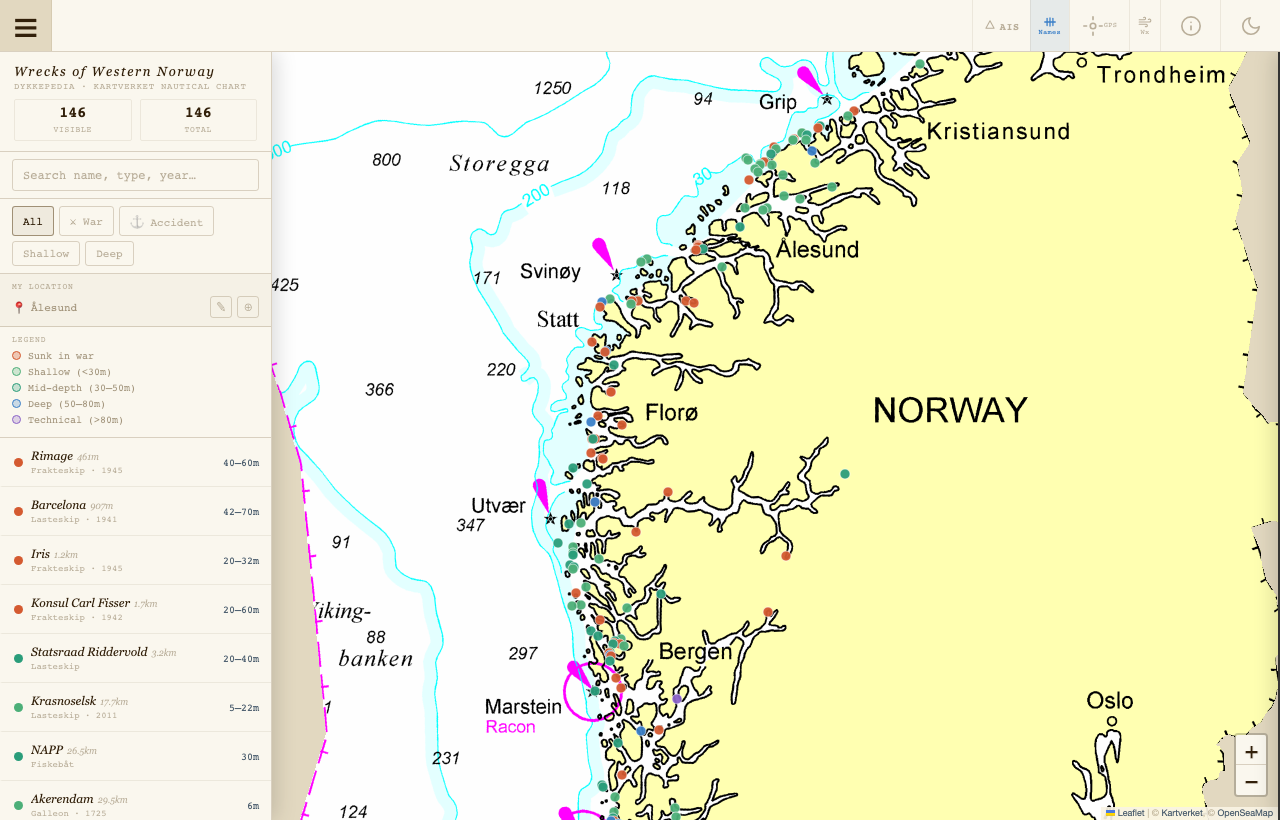
Tap ☰ at the top-left to open the wreck catalogue panel. On desktop it slides in from the left edge, overlaying the chart. On mobile it rises as a bottom sheet. Tap anywhere on the map or tap ☰ again to close it.
Search
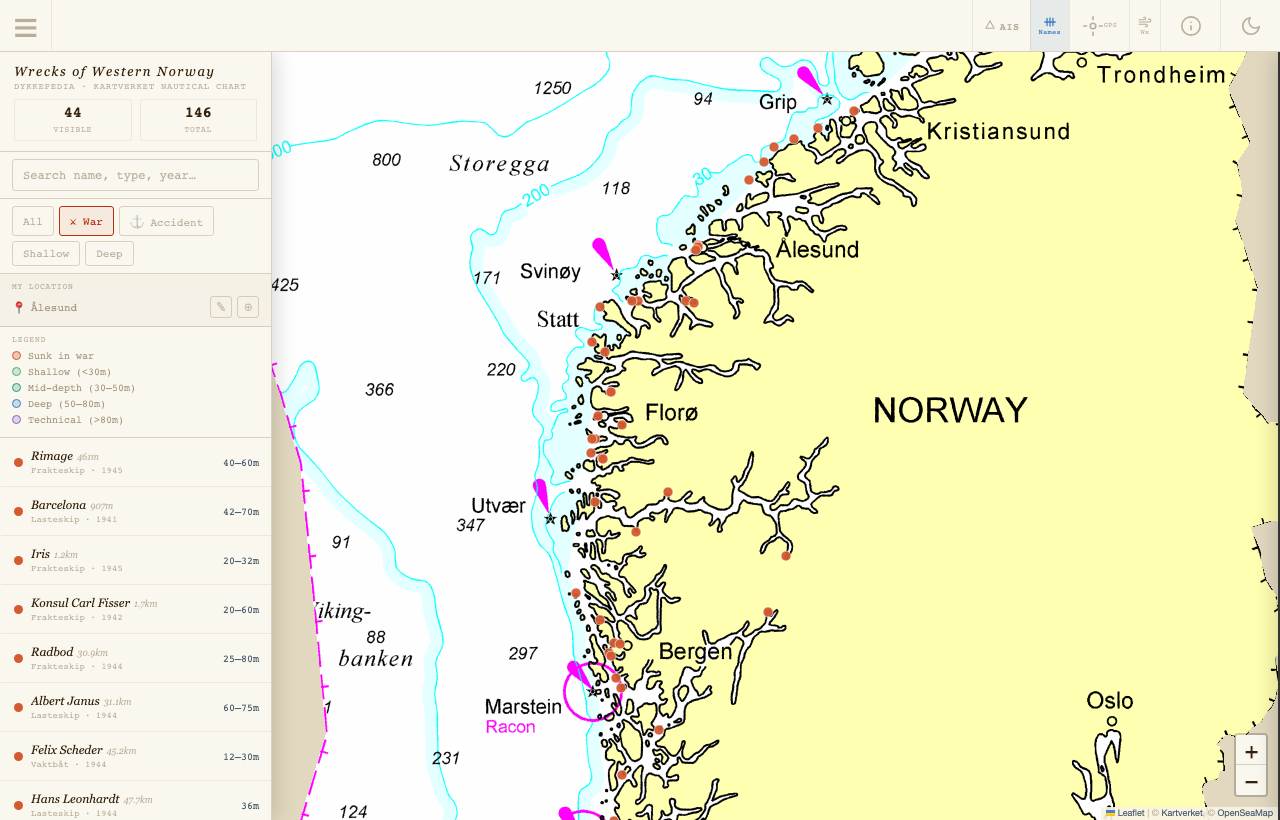
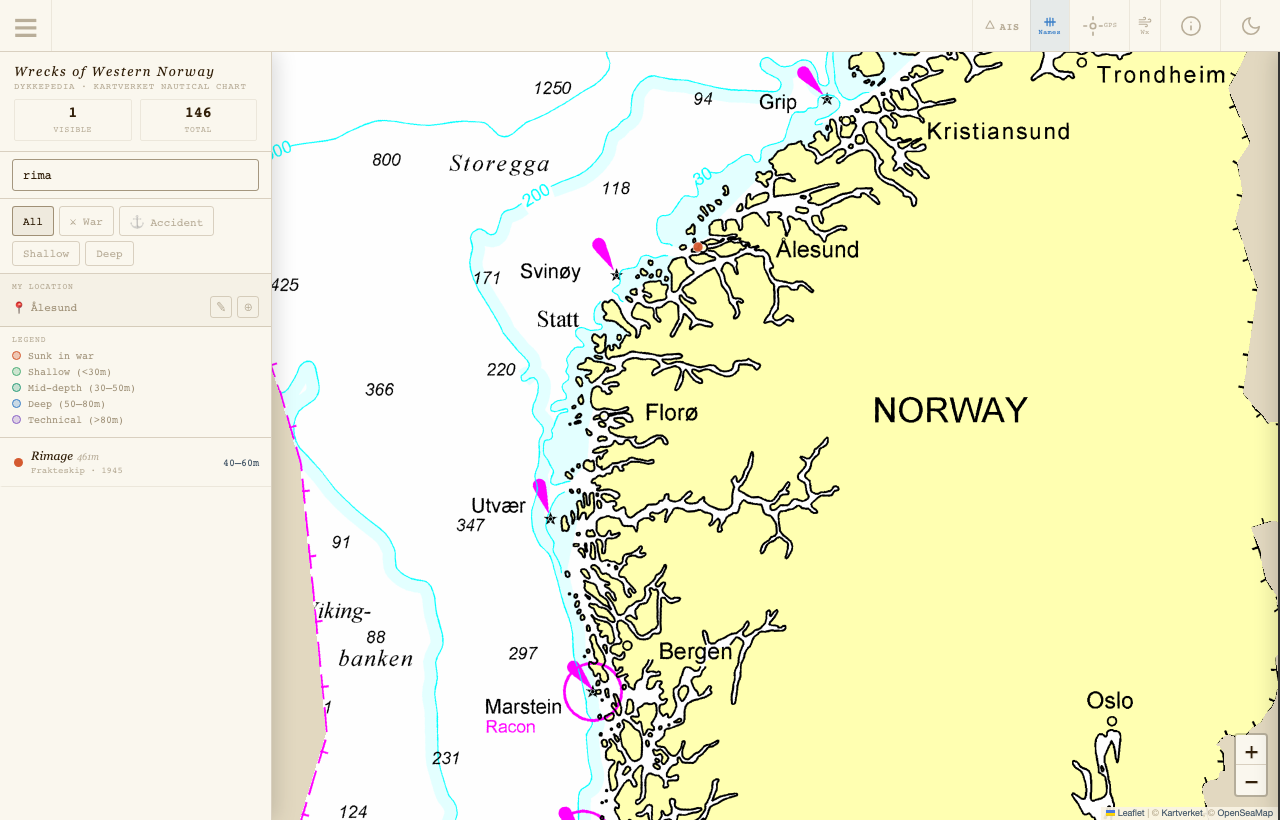
Type in the search box to filter by name, vessel type, or year simultaneously. The list and map markers update instantly as you type.
Filters
Only one filter is active at a time. Filters combine with the search box. When GPS is active the list sorts nearest first with the distance shown next to each name.
When GPS is active the list sorts nearest first with the distance shown in blue. Without GPS it sorts by your saved My Location (see Section 09), shown in grey — defaulting to Ålesund on first use.
Tapping any wreck in the list flies the chart to that site, opens a marker popup, and expands the top bar with key stats.
Wreck Details
The expanded top bar and full detail panel — using Konsul Carl Fisser as example.
Selecting a wreck — by tapping its map marker or its row in the catalogue — expands the top bar and opens the detail panel. The top bar shows the essential stats at a glance; the detail panel holds the full record.

The detail panel slides in from the right (desktop) or rises from the bottom (mobile). It loads full vessel data from the database including dimensions, historical records, and diving information.
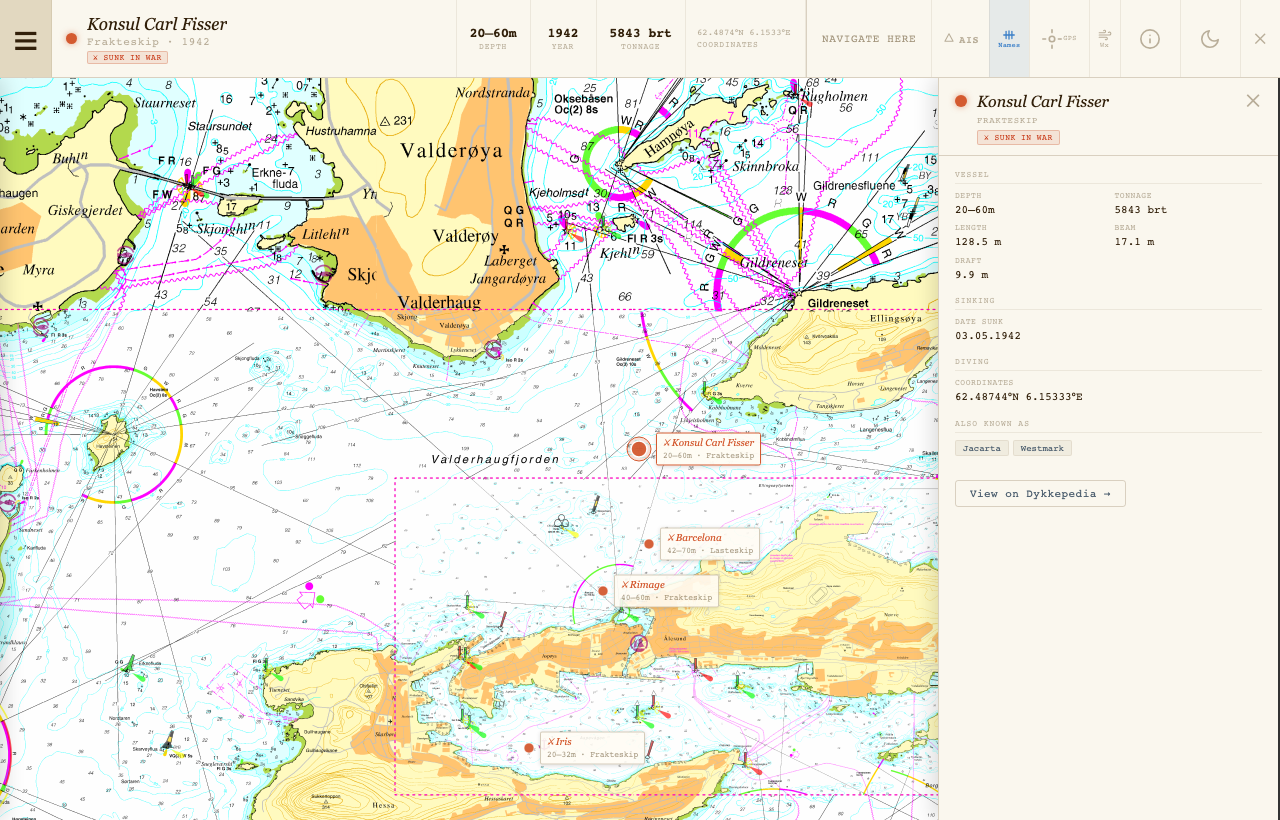
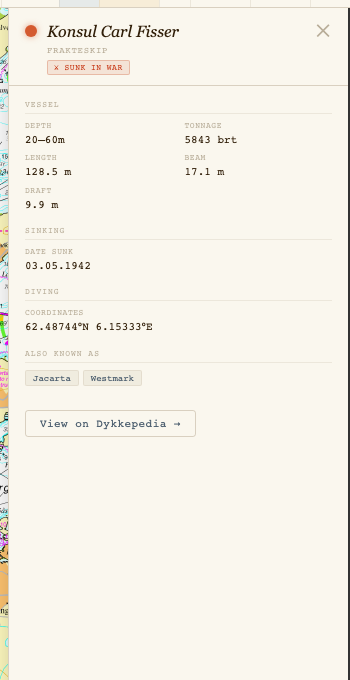
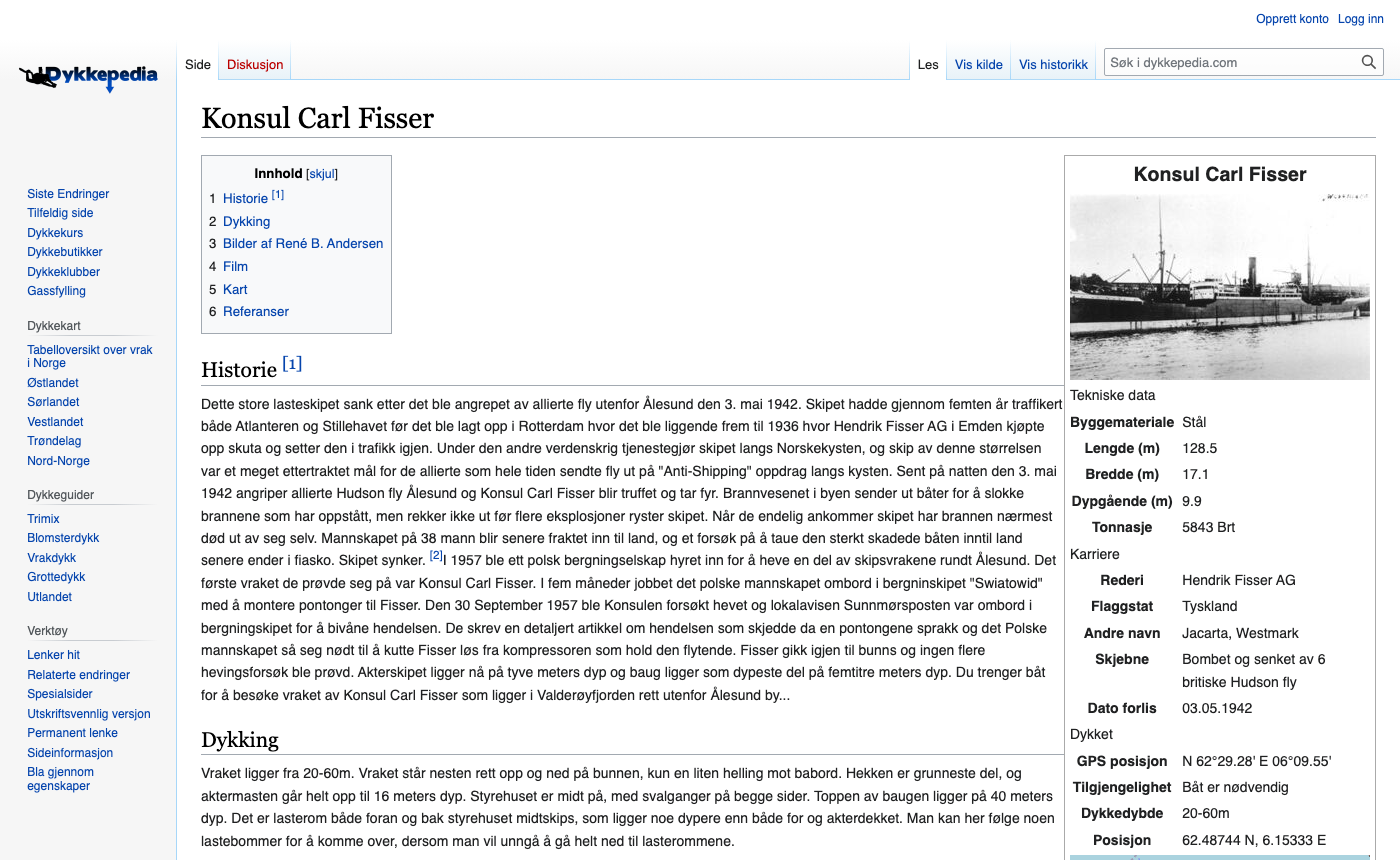
The Konsul Carl Fisser panel reveals the ship was a 128.5 m Frakteskip (freighter), 5843 brt, sunk on 03.05.1942 at 20–60 m depth near Valdøya. It was also known as Jacarta and Westmark. The View on Dykkepedia → link at the bottom of the panel opens the full Norwegian dive wiki article.
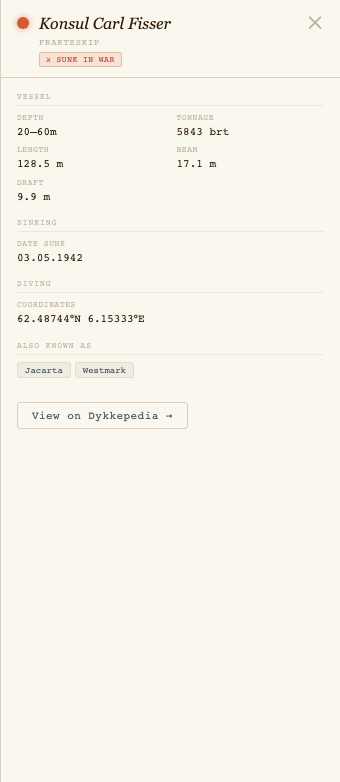
The panel is divided into sections:
Dive Difficulty: rated 1–4 dots — Easy / Moderate / Advanced / Technical. Close the panel with ✕ or by tapping the map.
Depth Colour Guide
Every marker coloured by maximum depth — war wrecks always orange-red regardless of depth.
Depth ranges like "20–60m" are classified by their maximum value — so the Konsul Carl Fisser (20–60m) renders in blue (50–79m bracket). Wrecks marked ukjent (unknown) appear grey. The depth legend is always visible at the bottom of the catalogue panel.
War wrecks are always orange-red. Many WWII wrecks lie in recreational depth — check the detail panel before assuming an orange marker is beyond your certification level.
GPS & Navigation
Locating yourself on the chart and navigating to a dive site.
Tap the GPS button in the top-right toolbar to enable location. The button cycles through states with each tap:
Your position appears as a blue dot with a translucent accuracy circle. The circle reflects GPS precision — smaller is more accurate.
If GPS is unavailable, Wmap falls back to your saved My Location (see Section 09) for distance sorting — distances shown in grey in the catalogue. If My Location is also unset, IP-based geolocation is used as a last resort.
Navigation Mode
With GPS active and a wreck selected, tap "Navigate here" in the top bar. The bar turns red and shows distance, bearing, and a rotating compass needle all updating live:

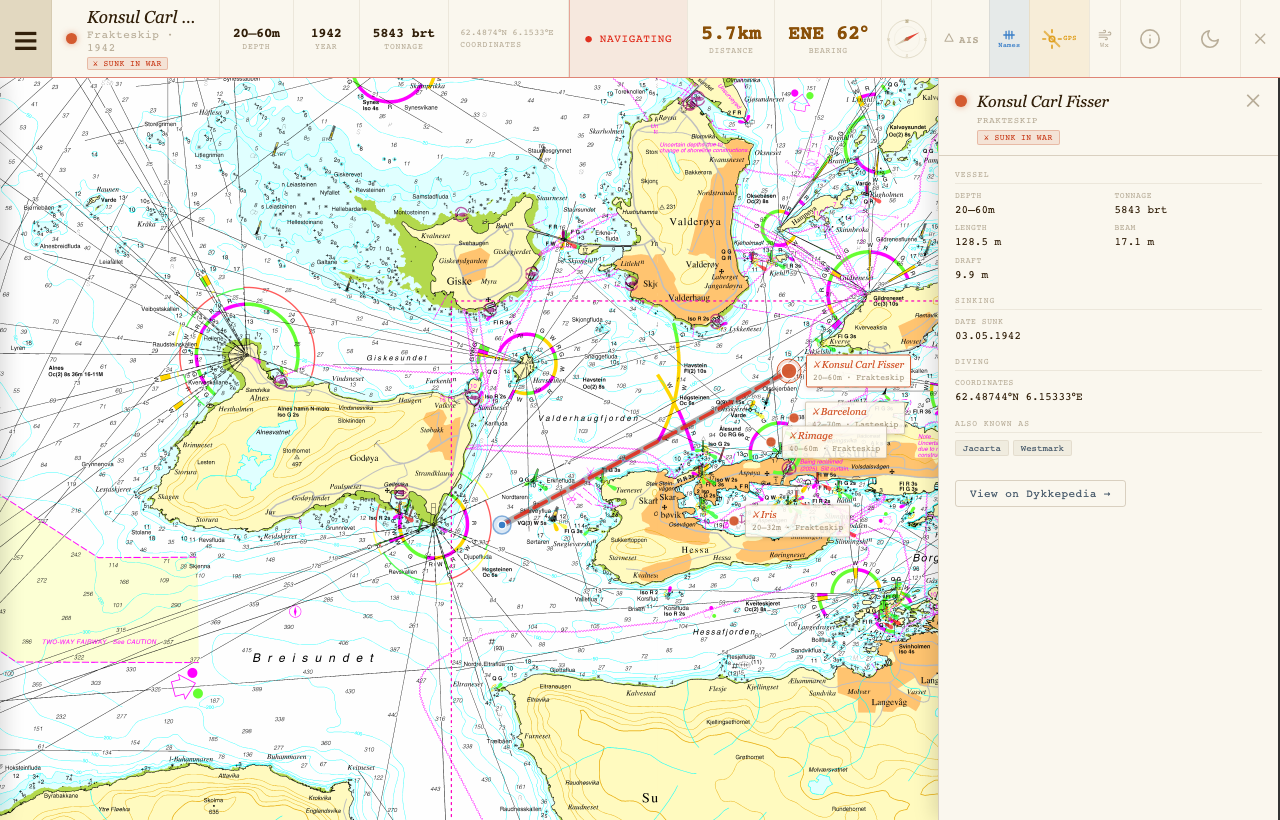
The bearing displayed is a true bearing (relative to true north). Most dive compasses show magnetic bearing — account for local declination if navigating precisely. In Western Norway, magnetic declination is approximately 2–5° East.
Live AIS Vessels
Real-time vessel positions from the Norwegian Coastal Administration.
Tap the AIS button in the toolbar to toggle live vessel tracking. AIS (Automatic Identification System) is the mandatory maritime transponder system used by commercial and larger recreational vessels. The button turns green and gains a highlighted background when active.

Wmap connects to the Kystverket live AIS TCP feed and decodes vessel positions in real time. All vessels within the current map view are plotted as triangle markers pointing in their heading direction:
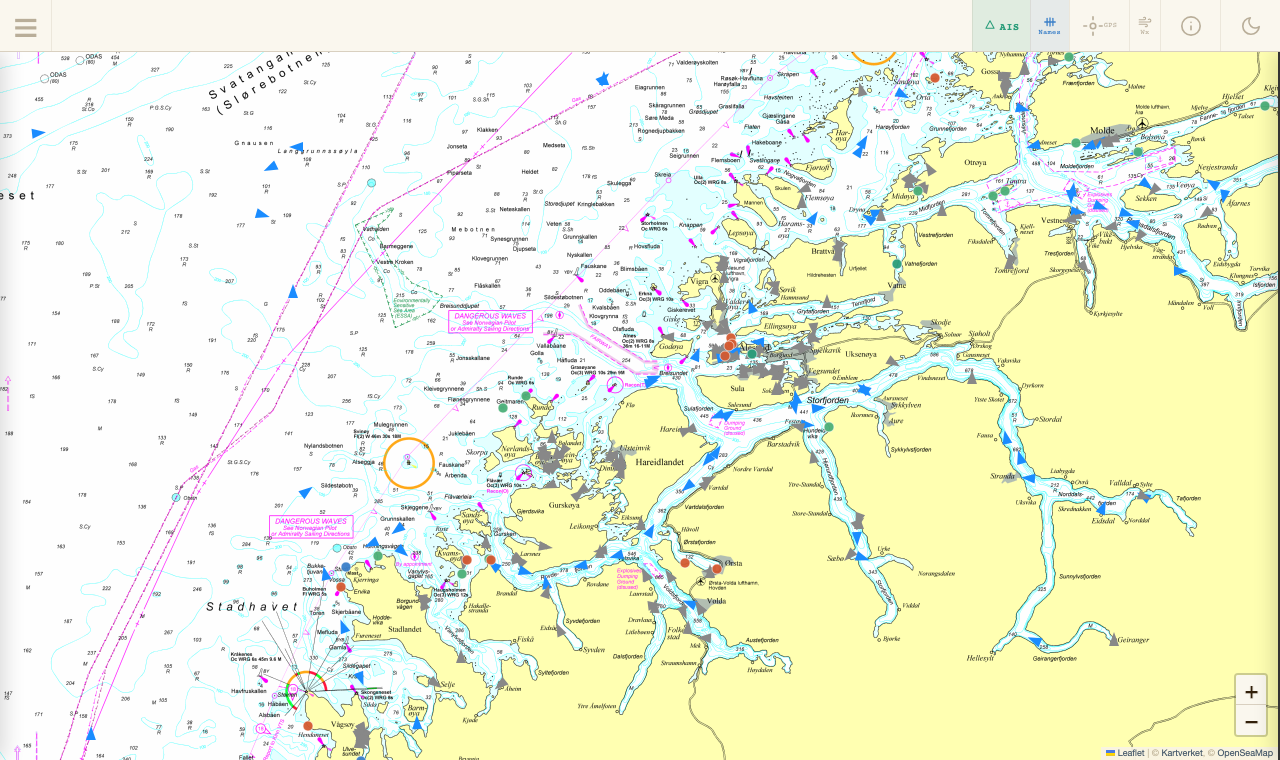
Zoom in to see individual vessel shapes more clearly. Each triangle is oriented to the vessel's heading, so you can read traffic direction at a glance.
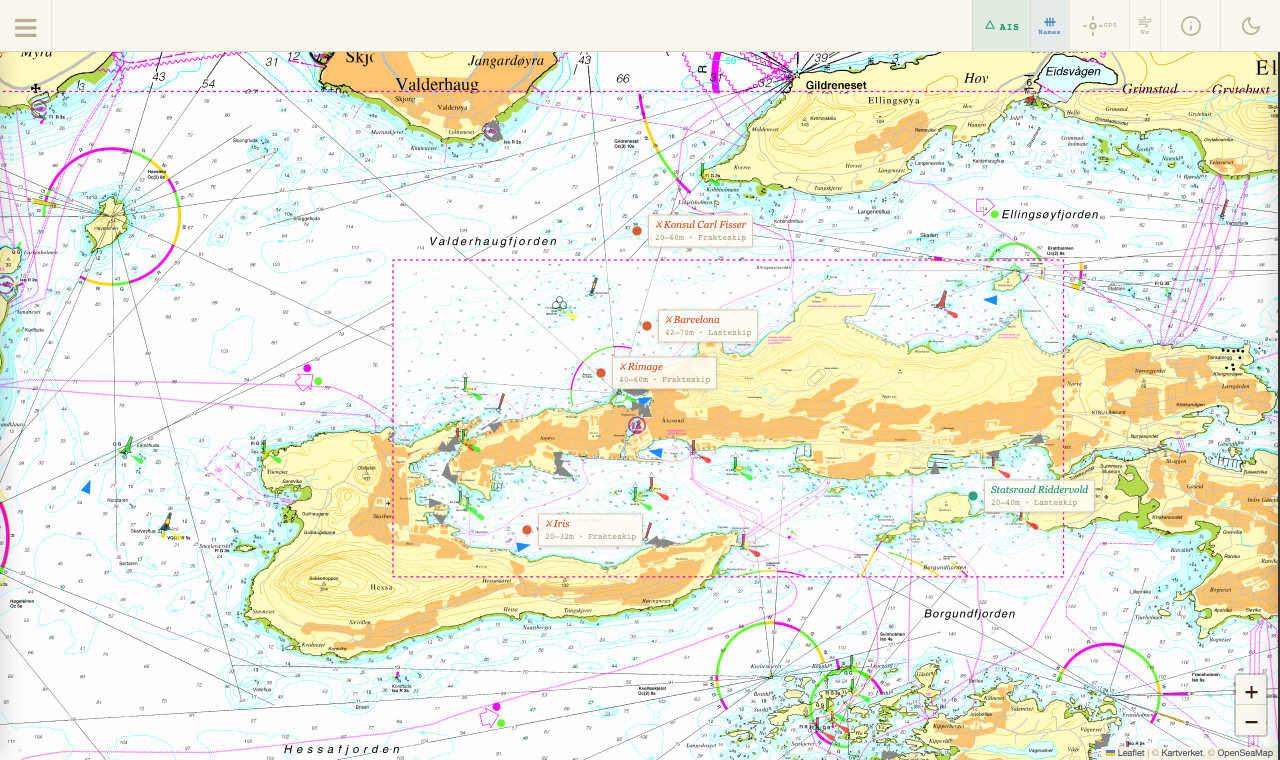
Tap any vessel triangle to open its information popup.
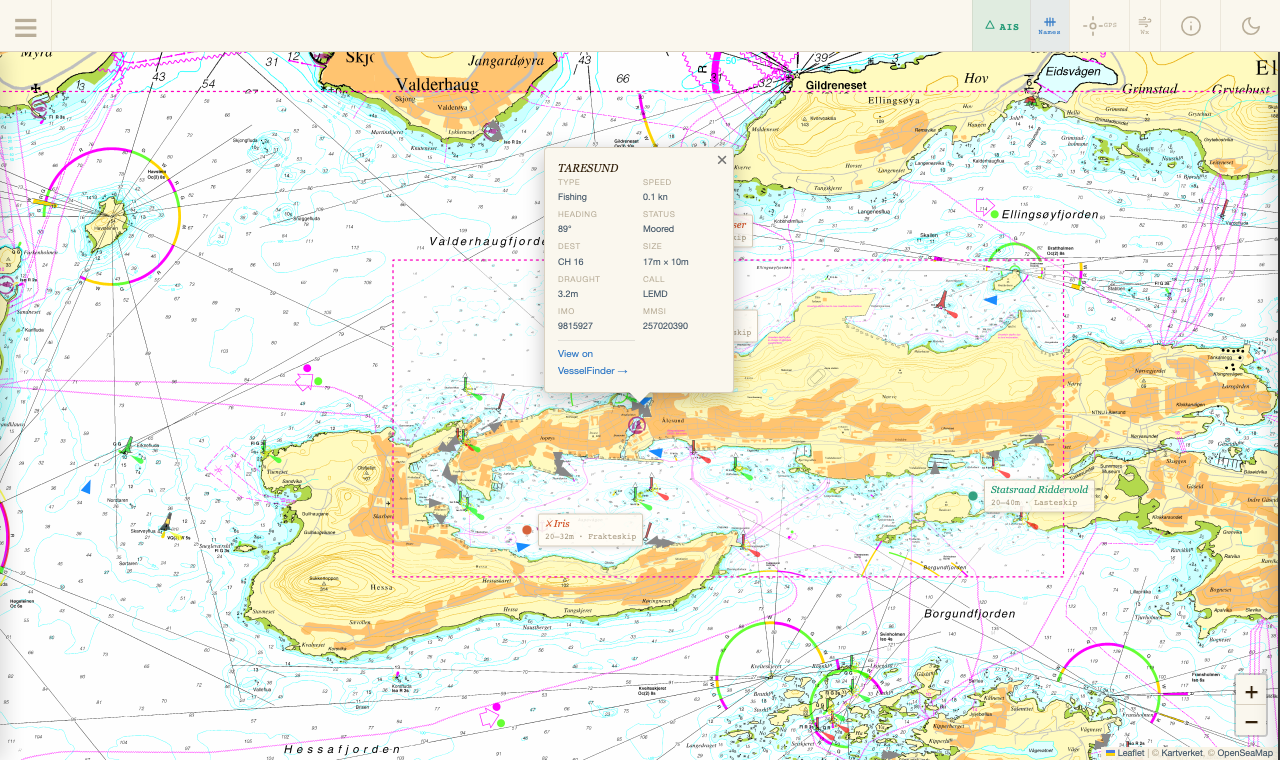
The popup includes a View on VesselFinder → link that opens the vessel's full profile on VesselFinder.com — showing its photo, voyage history, current track, and technical details.
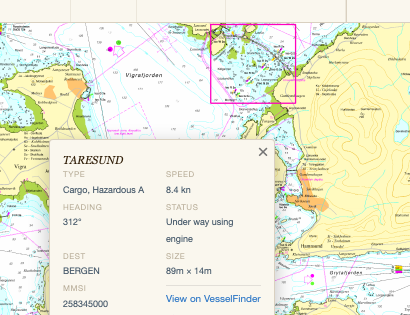
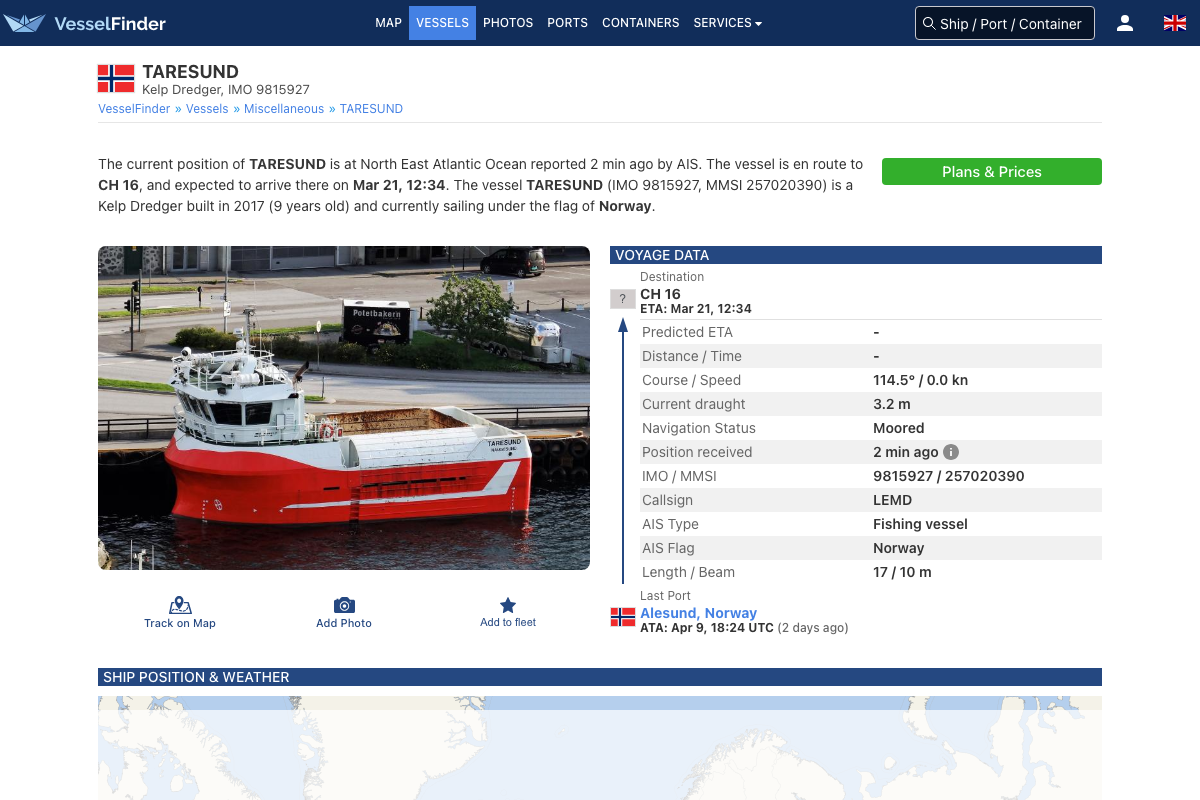
The overlay refreshes automatically as you pan the chart — Wmap re-subscribes with the new bounding box and updates vessel positions in real time. If the WebSocket connection drops, Wmap reconnects automatically with exponential backoff.
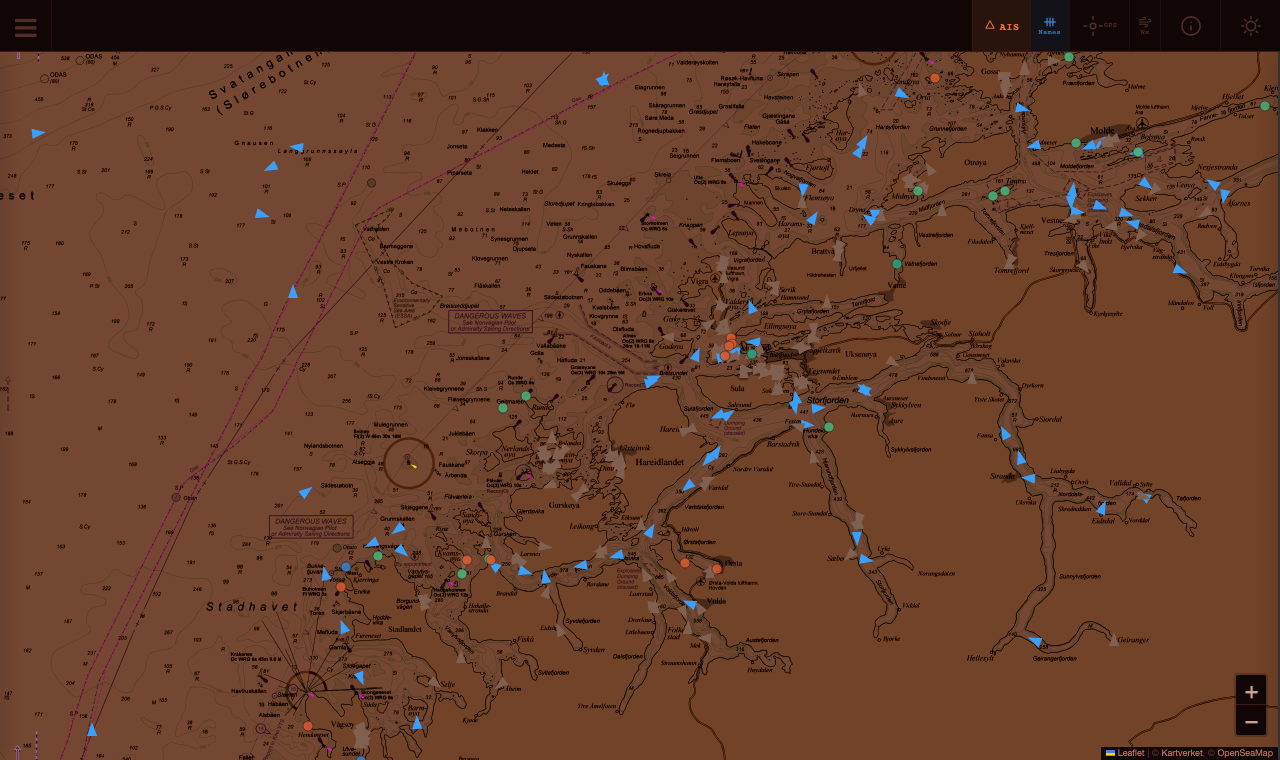
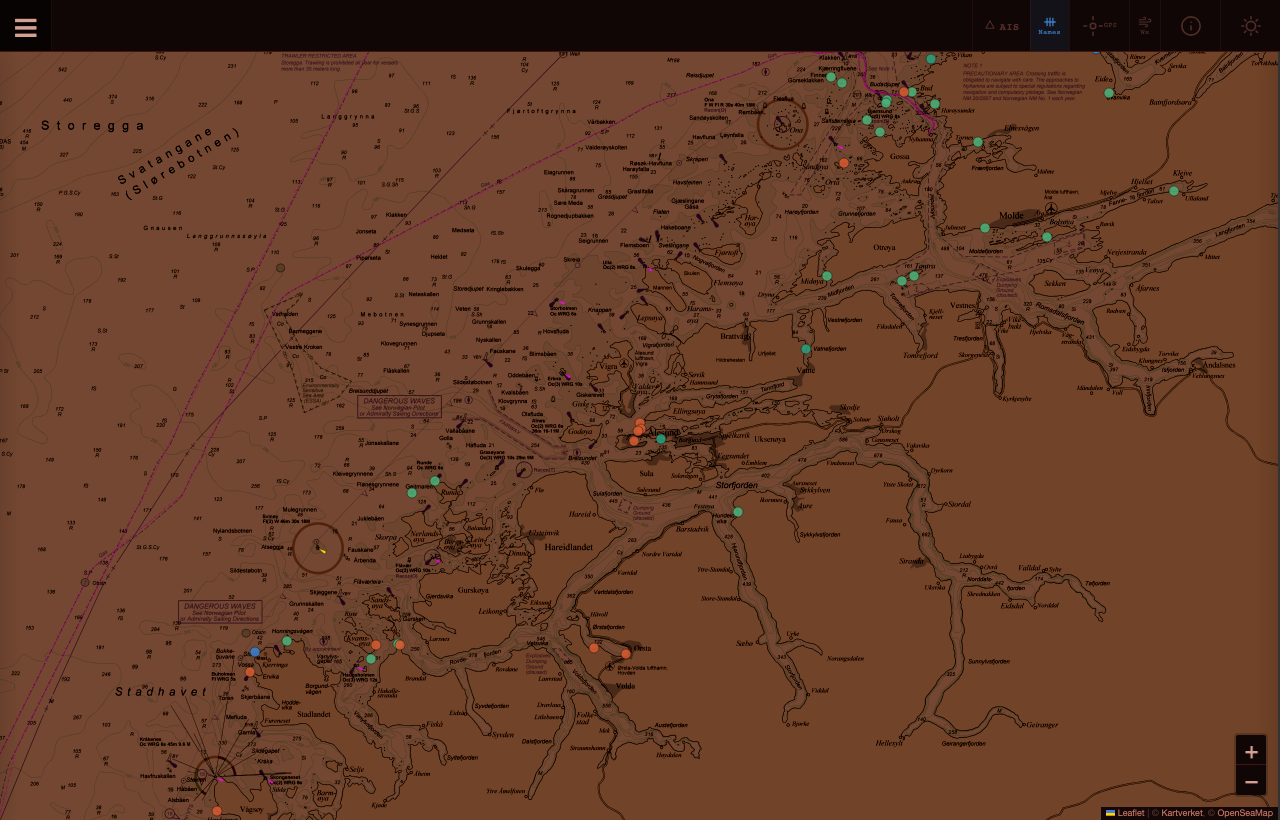
AIS tracking also works in dark mode. Vessel triangles remain blue and legible against the red night-vision chart:
Live AIS is only available when running Wmap locally or via the desktop app. It is not active on the public web version, which cannot make direct TCP connections to the AIS feed. The AIS button is greyed out on remote deployments.
Weather Overlay
Wind, waves, and marine conditions in a split-screen Windy view.
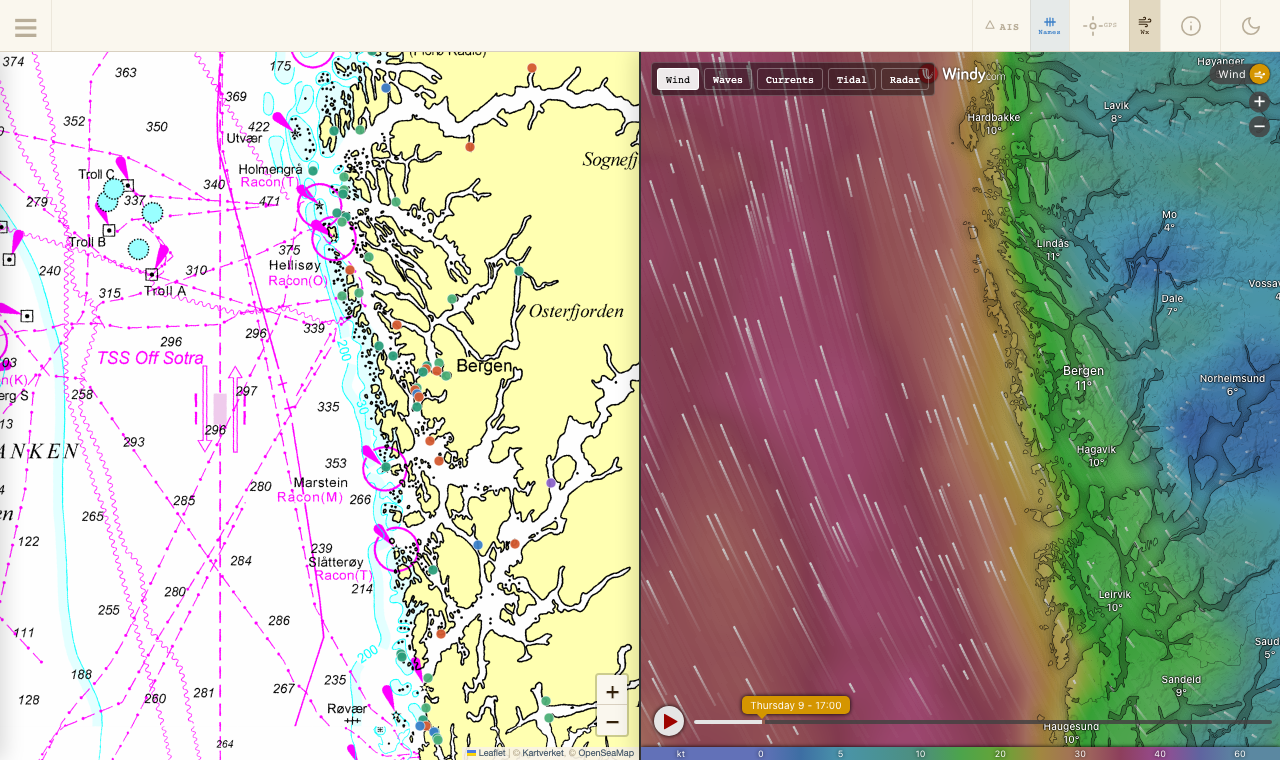
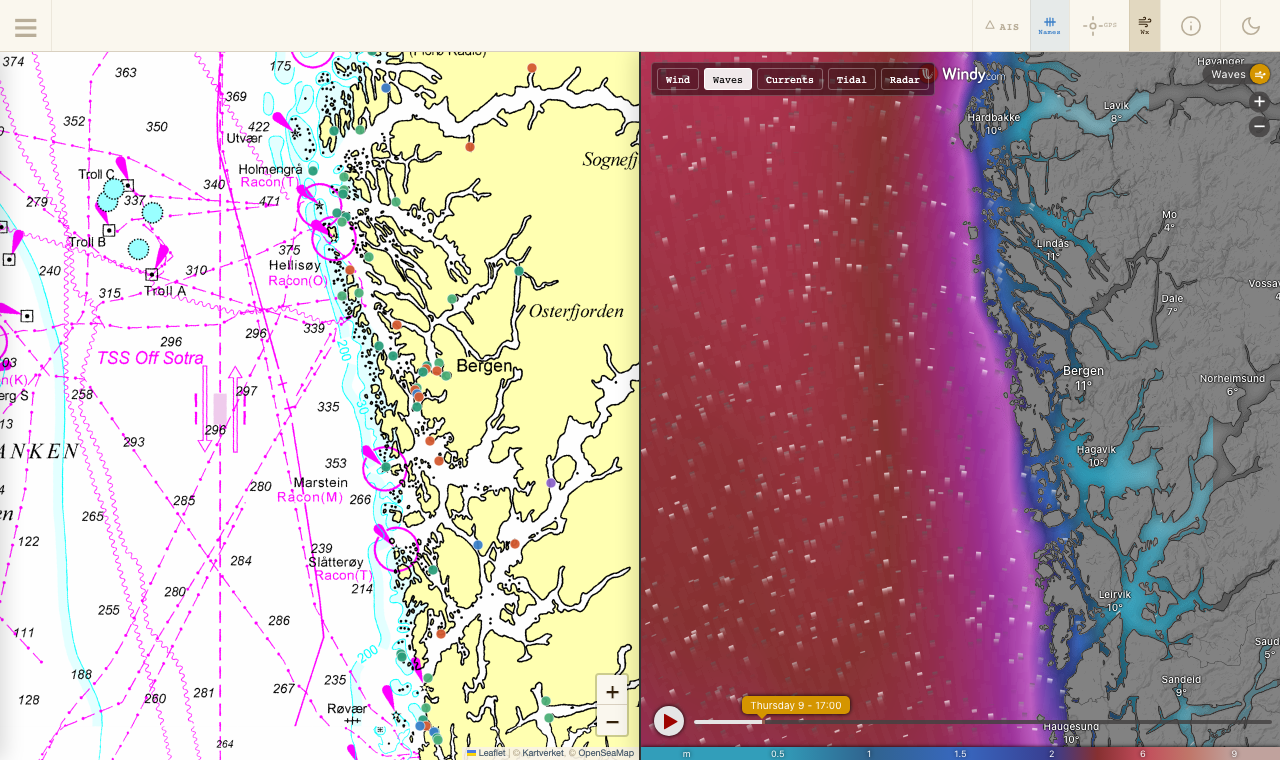
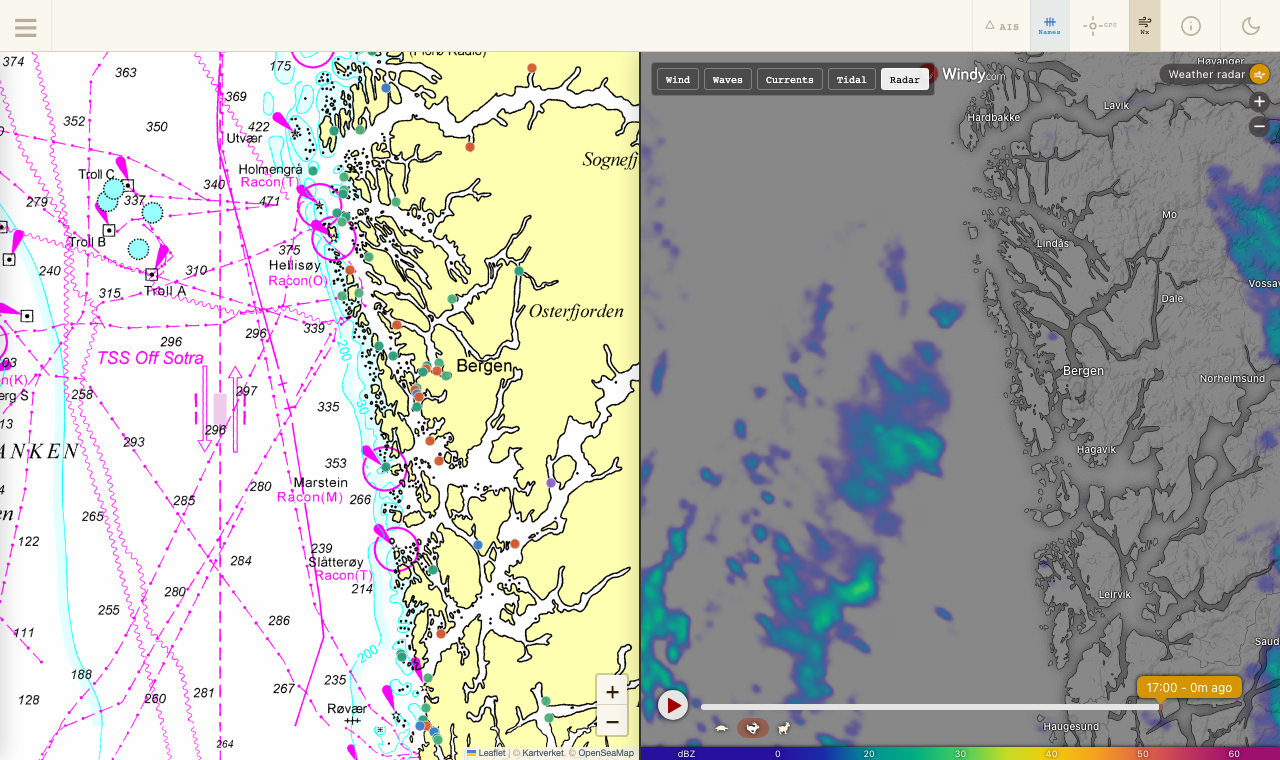
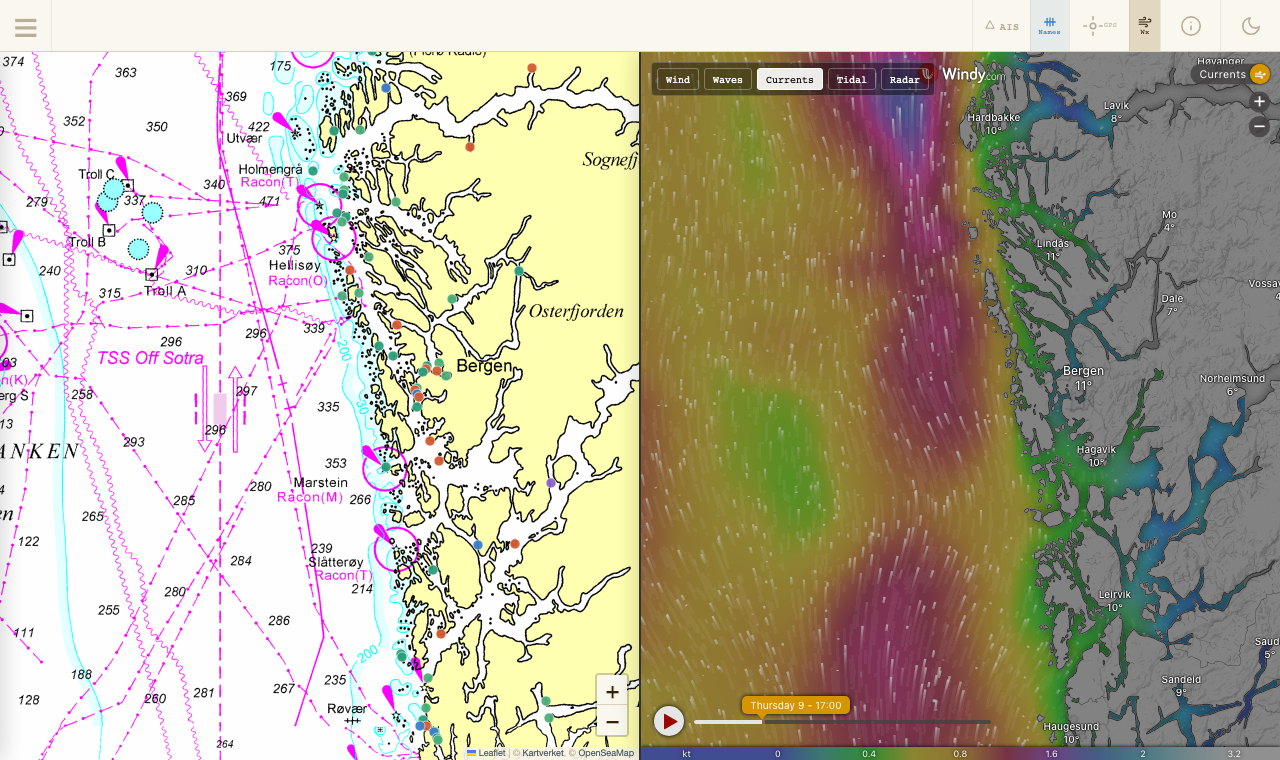
Tap the Wx button in the toolbar to open the weather split view. The map divides in two: the nautical chart on the left, a live Windy.com weather map on the right — both showing the same location. If a wreck is already selected when you open it, both halves centre on that wreck.
Use the overlay buttons at the top of the weather panel to switch between five modes:
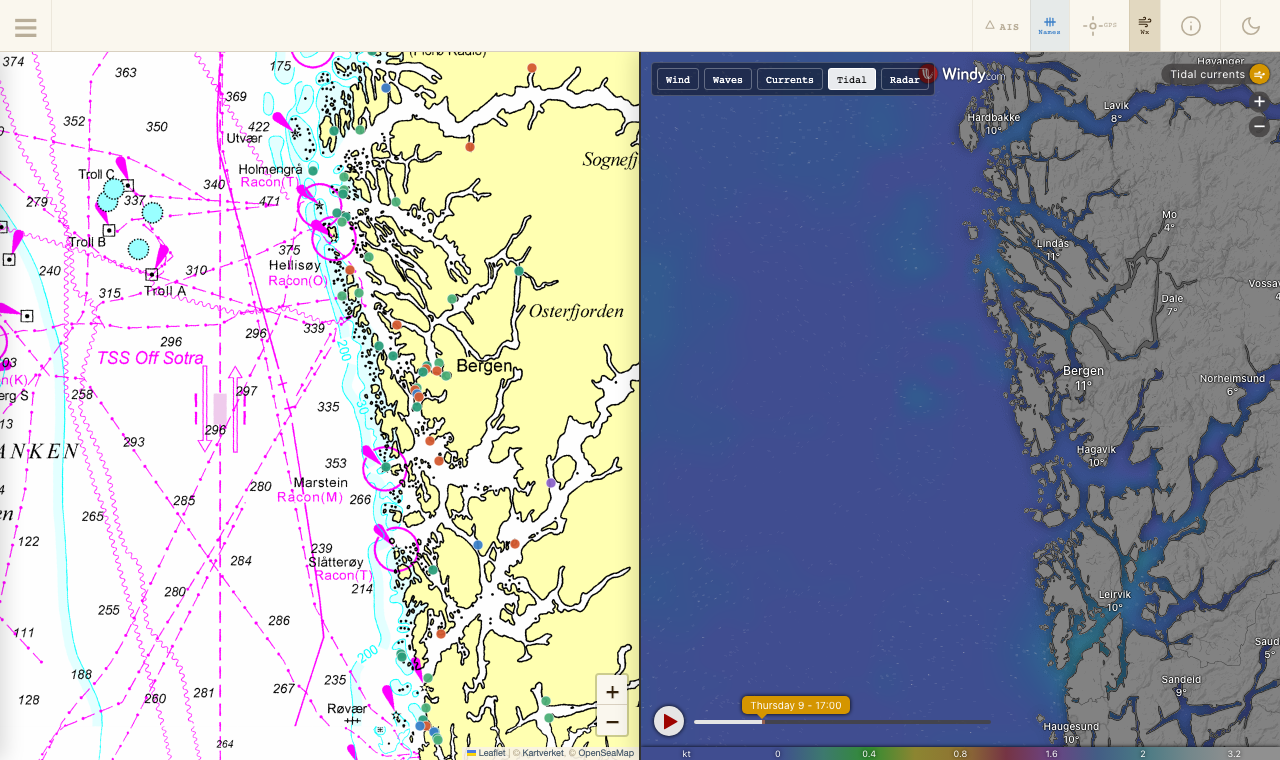
Tap Wx again to close the split and return to the full-width chart.
Select Konsul Carl Fisser (or any wreck near Valdøya) before opening the weather view — both the chart and Windy iframe will snap to that location, giving you an instant local conditions check for your dive site.
Display Options
Labels, light / dark theme, and how the chart looks.
Two display toggles sit in the top-right toolbar:
The dark theme applies a deep red filter to the Kartverket chart tiles, converting them to a night-vision style. This is specifically designed to preserve night vision when planning dives in low-light conditions aboard a boat.
My Location
A saved fallback position for sorting and map centering when GPS is unavailable.
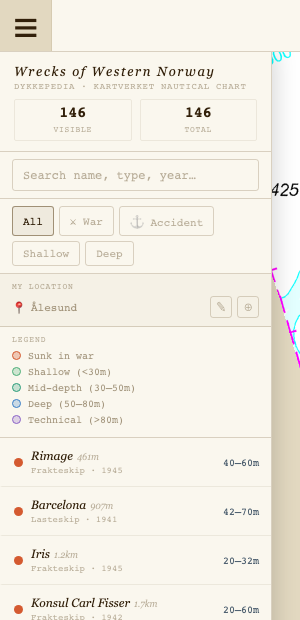
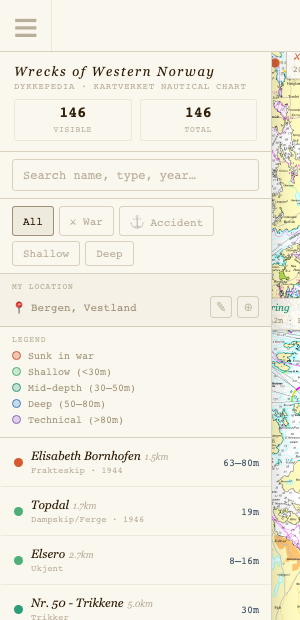
When GPS is off or hasn't acquired a fix, Wmap uses your saved My Location to sort the wreck catalogue nearest-first and to centre the map on load. Distances from My Location appear in grey next to each wreck — switch to GPS and they turn blue. Your saved location persists between sessions. On first use it defaults to Ålesund.
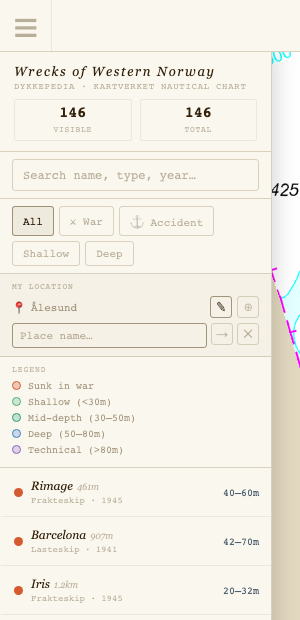
To set your location, tap ☰ to open the catalogue. The My Location row appears just below the filter buttons, with two action buttons:
Setting by Name
Type any place name — town, island, harbour — and press Enter or tap →. Wmap geocodes the name via OpenStreetMap's Nominatim service. The map flies to the result, the wreck list re-sorts by distance from the new location, and the name is saved for future sessions.
Pick on Map
Tap ⊕ in the My Location row. The chart enters pick mode — a banner appears at the top and the cursor becomes a crosshair. Zoom and pan to your position, then click anywhere on the chart. Wmap records the coordinates and reverse-geocodes a readable place name. Tap Cancel in the banner to exit without saving.
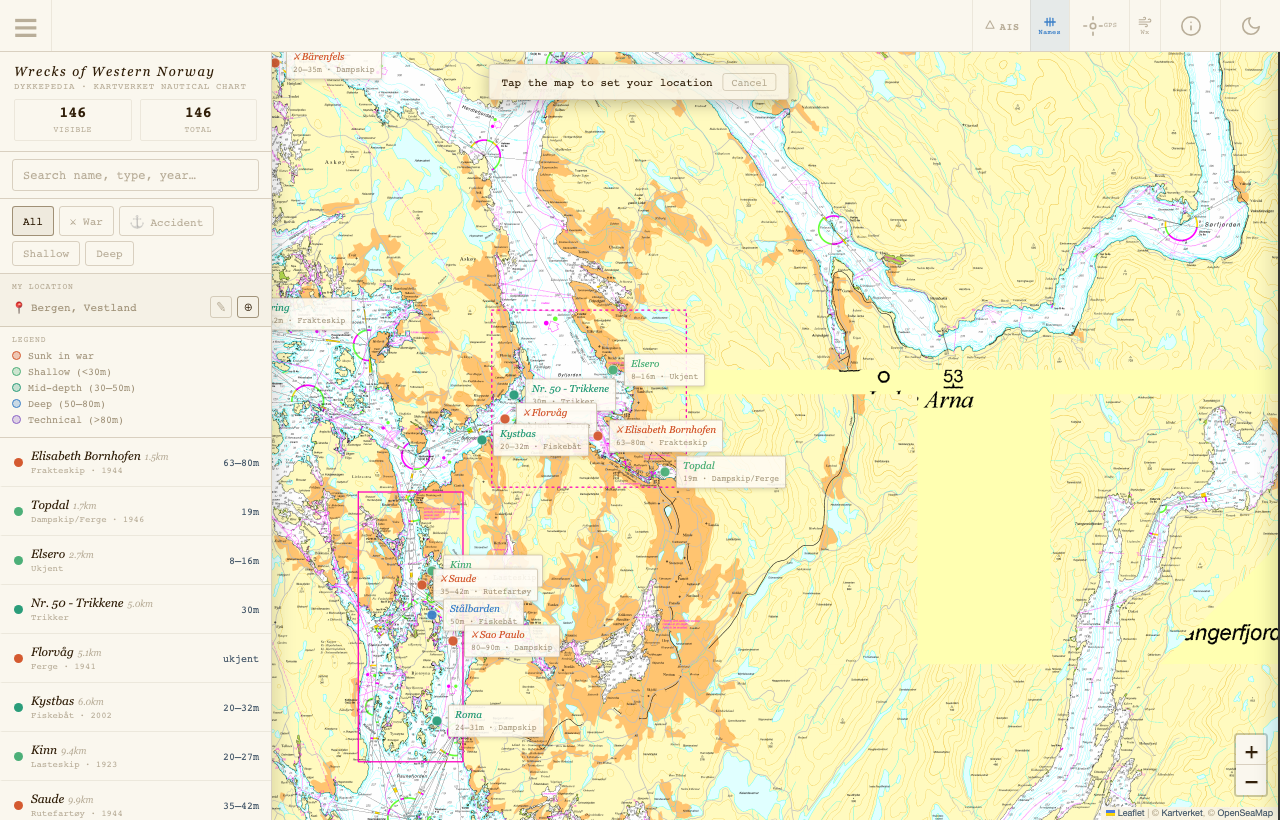
My Location is a fallback — it never interferes with GPS. When a GPS fix is active, live position always takes priority for sorting and navigation. Grey distances = My Location; blue distances = live GPS.
Installing the App
Add Wmap to your home screen for offline-ready access.
Wmap is a Progressive Web App. Install it to your device's home screen and it behaves like a native app: full-screen, its own icon, available offline.
iPhone / iPad (Safari)
Tap the Share button → "Add to Home Screen". An anchor icon appears on your home screen.
Android (Chrome / Firefox)
A "+ Install app" button appears in the catalogue header when the app is ready to install. Tap it and confirm. Alternatively: browser menu → "Install app" / "Add to Home Screen".
Desktop (Chrome / Edge)
An install icon appears in the address bar. Click it and confirm, or use browser menu → "Install Wmap".
Once installed, Wmap caches itself for offline use. The wreck catalogue, filtering, and navigation features all work without internet. Map tiles and weather data require a connection.
A standalone Electron desktop app is available for macOS and Windows. It includes always-on AIS vessel tracking and native GPS — no server setup needed. Contact the developer for the latest build.